

Charlie
St John

Photography
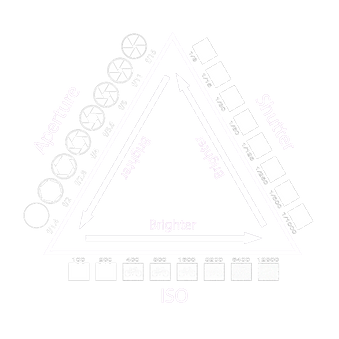
Aperture
Aperture is used to control the focal length of a photo or video. It is controlled by a small hole which dilates or shrinks depending on the number you put it on. A small aperture keeps the background and foreground focused while a larger aperture will blur the background, bringing the focus to the foreground. It is measured in F/stops.
ISO
ISO is a cameras sensitivity to light. Its stands for 'International Standards Organization' who set the standard for the iso sensitivity. The higher the ISO, the more light sensitive the sensors in the camera are. The lower the ISO, the Darker the image will appear as the sensors light detection is turned down. ISO is mesured in numbers
Shutter speed
Shutter speed controls how long the shutter stays open when it is pressed. this lets in more light for longer. This is used to create motion blur. an increased shutter speed creates more motion blur whereas a decreased shutter speed lessons motion blur and is used for action shots for a clearer image. It is measured in fractions of a second.
Photography
Photography
Slow shutter speed photography


Photography
This edit was my first-time using Adobe Lightroom. I began by playing around with the exposure settings, contrast, and the highlights/shadows sliders. After this, I began experimenting with the colour grading options. I decided to go quite cold with my colour scheme as I was going for a horror-like look. I enhanced the shadows, lowered the exposure, and heightened the contrast to create a harsher outcome. I then figured out how to use the masking tool. This tool helped me to select specific parts of my photo that I wish to edit without it affecting the rest of the image. I used this tool to brighten mine and Ellie’s faces in comparison to the background of which I had made darker to make us stand out. I also added more texture into my photograph using the grain tool at small amounts to give it a slightly more retro impression. I believe that for a first attempt this went according to plan and helped me learn about how to utilise Adobe Lightroom to create my vision that I wish to achieve while composing the photograph. Ben took the original photograph.
Photography
Photography


This edit was the first edit that I did of my motion blur photo shoot. To take this photograph, one of these subjects (Ellie Walker) made a hand motion at subject #2 (Ben Hargreaves) Who jumped backwards as the photograph was being taken to give the impression that he had been hit and he was flying backwards as the photo was being taken. I took this photo.
To edit this photo, I used Adobe Lightroom and began (as always) by adjusting the exposure, the contrast, and the highlights/shadows. The end product from this step made the photo look grungier and darker. I then colour graded. I made this image coldly toned to add to the grungy effect I am looking for. I did not use the masking tool in this one, so the photograph looks more natural which is what I was going for. I again added grain to make it look as if it had been taken on a film camera which was inspired by nan Goldin’s imagery. I absolutely love this photo as well as the finished product.


In this image, I took a photo in the mirror of the college elevator using a low shutter speed while rotating the camera clockwise to create a round motion blur effect. I love the fluid outcome of this photograph and it is one of my favorites of this photoshoot. I went for a feeling of delirium with the editing of this image; trying to experimenting with the color grading, contrast and texture. I made the photograph jungle green and chartreuse toned and made the motion blur lighter to make it appear Luminant. I love the grungy appearance that I created in this edit and composure of my image. As an experiment with motion blur and color grading, I believe I did a relatively good job. this has taught me camera settings and how to use adobe Lightroom to my advantage.
Photography
Photography
Photography


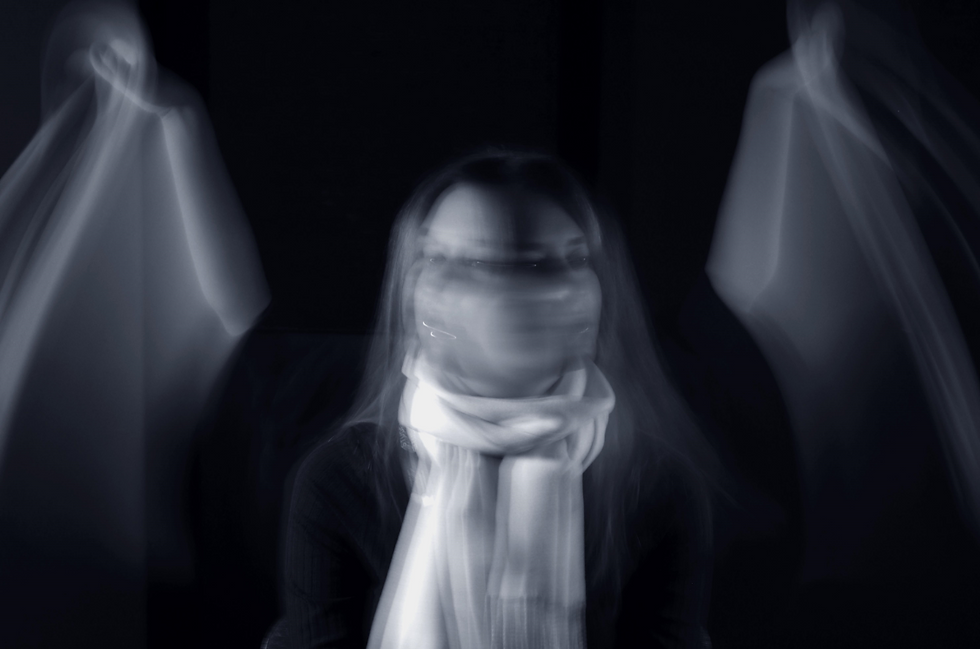
This photo was taken by Ellie of me at a crooked angle also known as a Dutch tilt. We used a slow shutter speed and moved the camera to take this image. This resulted in a ghostly outcome where bits and pieces of me are transparent. The only issue that I have with the composition of this image is that I believe it was taken to high up which makes the image look awkward an empty. If this image was a little bit longer I would have absolutely loved this. I do however think it already looks well put together.
To edit this, I turned down the exposure and heightened the contrast. This made the image look grittier and more dramatic. I made the background hallway darker than the subject to draw the viewers I to the main focal point of this image. I turned up the blacks and darks of my image to also convey this. I added film grain to finish it off.
Photography
Photography


For this image, we used a slow shutter speed as the three of us jumped of the stairs. the image was also taken with a Dutch tilt angle which is used to show instability. this is also reflected in the shaky movements of the camera while the image was taken. To edit this photograph, I yet again used adobe Lightroom.
I started by reducing the exposure, highlights and shadows to create a grungy filter effect on this image. I also color-graded it to look a lot colder by individually coloring the shadows more of a greeny-yellow, the highlights purple and the mid-tones lime green. I finished off by cropping the image and adding slight film-grain.
Photography
Other edits
Photography
Photography


Natural lighting
Project overview
We were given the task of going off with our phones to use as cameras and find a place with interesting and useful natural lighting. we were told to take portraits of our peers. My subjects were originally just Ben and Ellie, but others from the class later joined us and i took one or two photos of them. i edited these photos relatively discretely as i wished to keep the natural look of these images.


Photography
Photography
Photography


For this photoshoot, we used our phone cameras in natural light that we could find around the college grounds. This meant we had a lot less controls for our cameras and had to utilize the world around us to achieve the effect that we wished to create. The most interesting location that were found as a group was the stairwell windows as it casted unique shadows onto the subjects face. The lighting also smooths out the face, creating a silky and illuminating finish on the end product. This image conveys a very serious and almost angry emotion in the subjects face.
When editing this image, I made the lighting more harsh to reflect the serious tone of the image. I did this by heightening contrast, changing the amounts of highlights and shadows and adjusting the exposure.
Photography
Photography


In this photograph, we looked around the college grounds to find a location with interesting and unique lighting. we came across a window in the stairwell which casted captivating shadows on to the subject, illuminating randomised areas of her face. this image was taken on my phone away from any studio lighting so that we had to experiment with cleverly composing our images so that we could take advantage of the scenery and atmosphere around us.
I edited this photograph using Adobe Lightroom where i made the lighting more dramatic by editing the exposure, contrast and highlights to emphasise the shadowed and lighted parts of the image. i then made the image black and white. as I believe it looked quite aesthetically pleasing in this shade range. As shown in my photographer research, i feel particularly inspired by black and white photography. some of these photographers include people such as Vivian Maier and Erwin Blumfeld. This image is one of my favourites from this photoshoot as i believe it looks visually interesting and unique, especially in black and white.
Photography
Photography


This image is an extreme close-up of an eye with. the subjects face being scrunched in anger. i chose this pose as i thought that the wrinkles would add a cleaver depth to the photograph and help me to create more shadows into the natural lighting used for this shoot.
The editing i did. on this image is very minimal as i thought the original photograph was above adequate as it was and i just wanted to tweak a few final bits. i just warmed up the tone of the image a slightest bit and changed highlights, exposure and shadows to just add a little more depth
Photography
Candid Images
Photography


Photography
For this photoshoot, I used a disposable film camera to take candid photographs of various different subjects to just show what i was seeing in my day to day life. this type of photography was inspired by Nan Goldin who i studied in my photography research section of this website. I purposefully did not edit these images as Nan Goldin would not have due to the lack of technology from when she was at the peak of being a photographer. I also find that film cameras already give a gorgeous filter left untouched as specific films can be pre-filtered. I was very proud of all of these images as I believe i captured Goldins style of photography well while still putting my own twist on it.
Taking inspiration
Statement on ideas
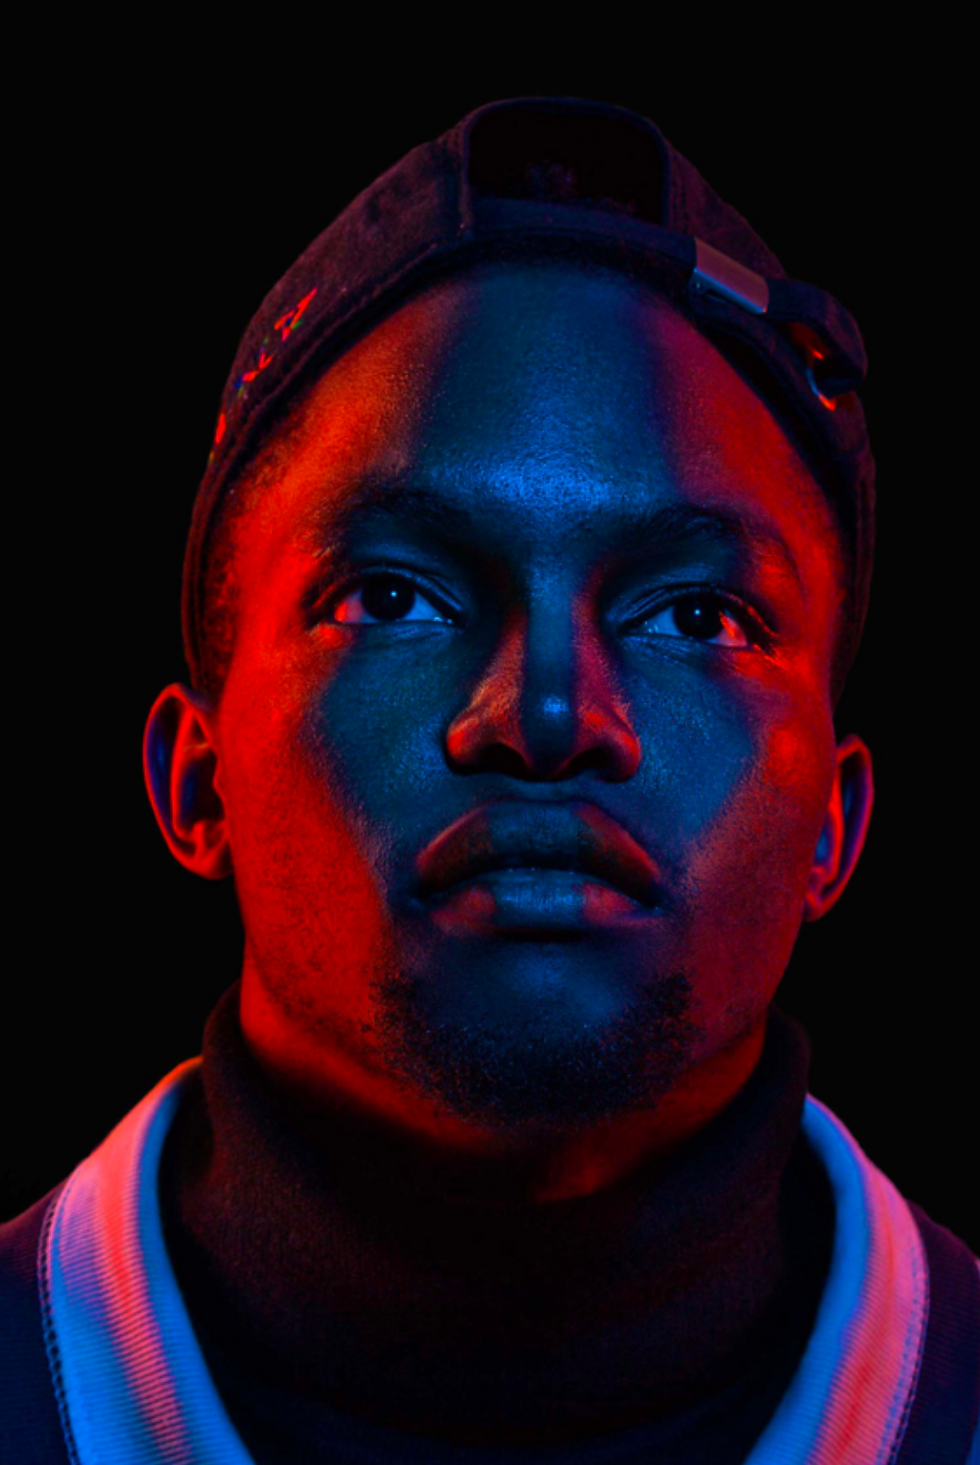
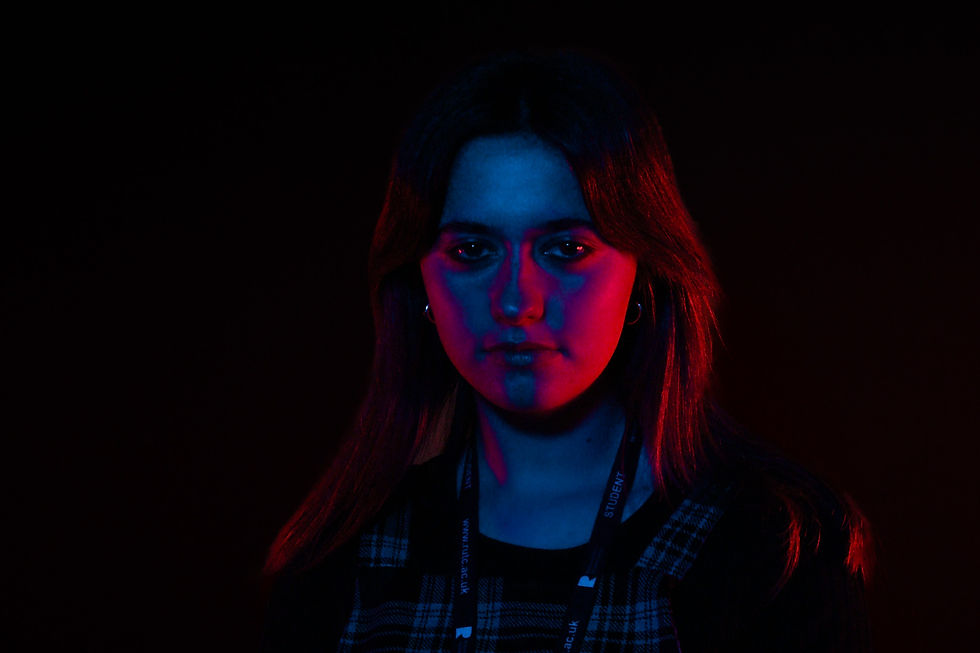
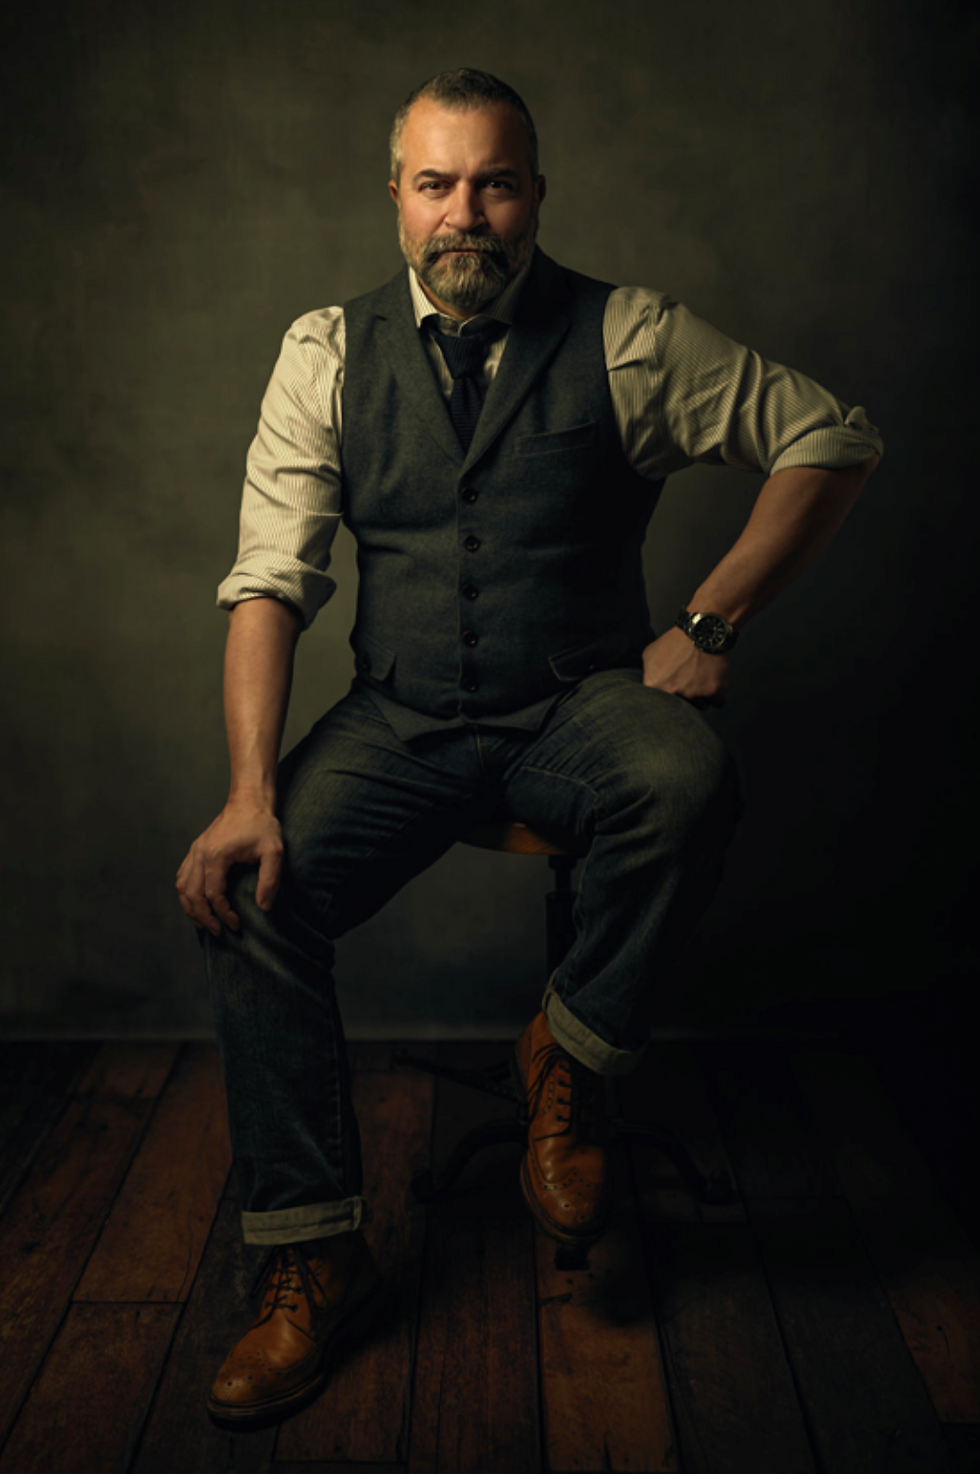
We were tasked to re-create images that we were given on a PowerPoint of portraits using unique styles, angles, lightings and colour schemes. We first set up the red and blue three point lighting to recreate the image of a man at eye level with blue at the center of the face but red on either side. we also did a sitting down portrait with a yellow-tinted three point lighting. I believe this photoshoot went very well and I thoroughly enjoyed the editing process of these images due to the interesting use of colour. this was also good so that I could learn how to take inspiration from photographers and put it into my work better than I could before.


Click on an image to expand
How i did the blue and red lighting

To recreate the lighting of the red and blue photographs, we had to do a three point lighting set up. the two lights on the sides used red gels, where as the key light used a blue gel. We encountered an issue in this set up because the red light was too intense and covered most of the subjects face, completely washing away the blue. we solved this by pointing the two blue lights that were either side of the subject in the direction of the wall behind them. this lessoned the amount of lighting which would spill on the subjects face, creating that thin layer of red either side of the blue when looking at the final images. the camera was set at an eye level shot from the front of the subject, placed next to the blue key light.


Inspiration photo
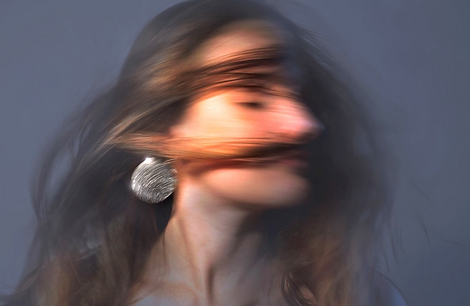
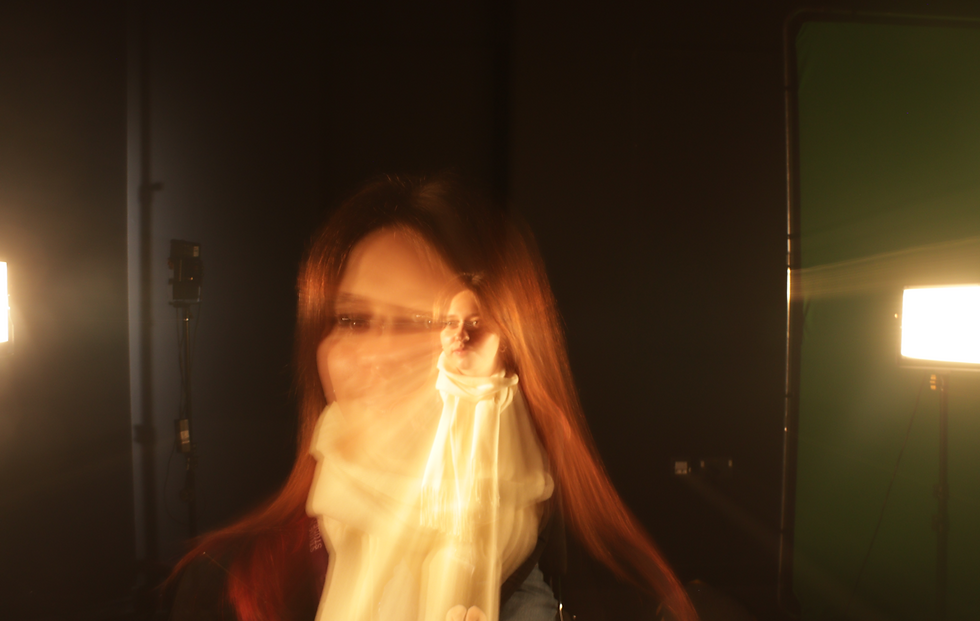
The teachers supplied us with this portrait of a woman moving her head around using slow shutter speed. we got carried away with creativity and made some really uniquely looking photographs. I am very proud of this work.